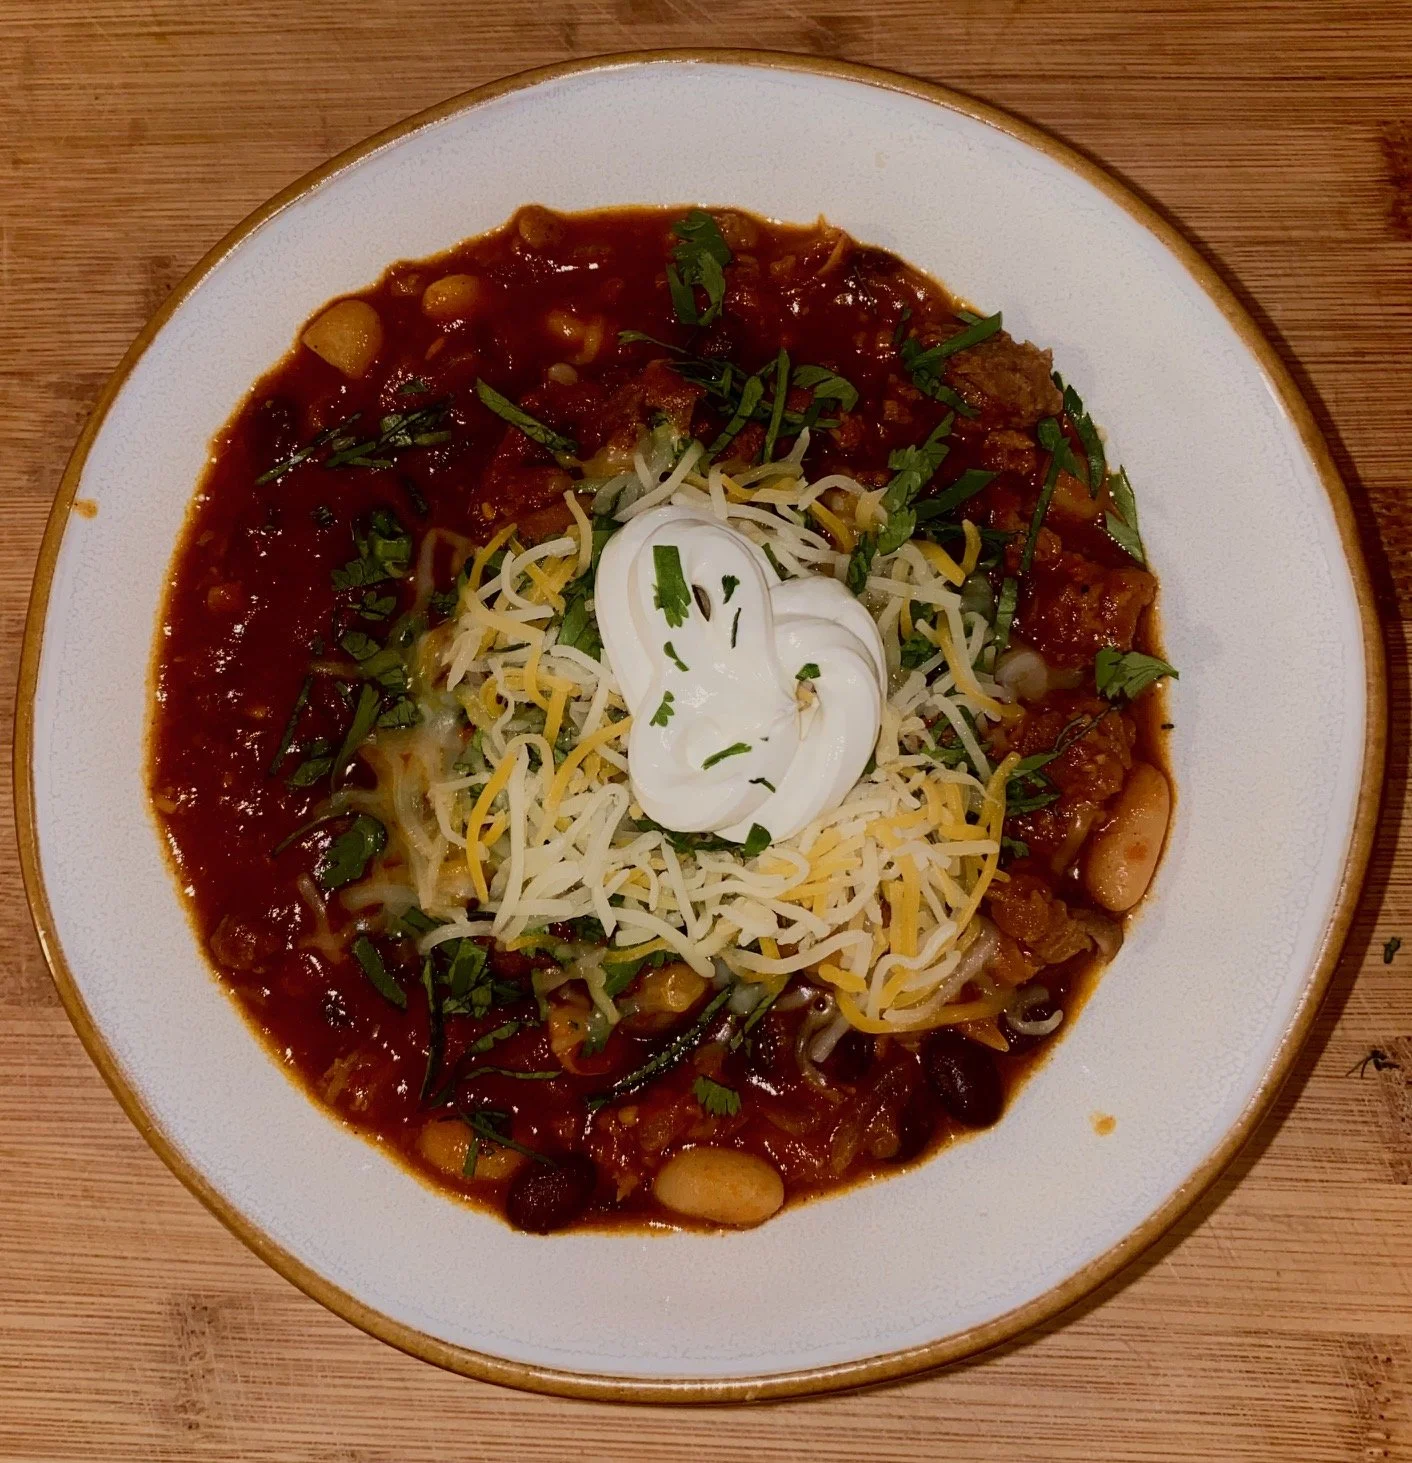
Beer Can Beef Chili
Working Time: 20 minutes
Cook Time: 2 hours
Ingredients
- Cooking Oil (California Olive Ranch Extra Virgin Olive Oils 30% off)
- 2 lb beef chuck roast stew meat (20% off)
- 1 can of a malt forward beer (I like an Amber with Chocolate notes, but any beer will do)
- 1 large yellow or Vidalia onion
- 1 large bell pepper (-$1.50/lb)
- 1 can diced tomatoes
- 1 can crushed tomatoes
- 1 can black beans (365 $.50 off/can)
- 1 can pinto beans (365 $.50 off/can)
- 1 tbsp Better than Bouillon Roasted Beef Base (recommended) OR 1 cup beef stock
- Spices: 2 Tbsp chili powder, 1 Tbsp cumin, oregano, 1 tsp paprika, 1 Tbsp garlic, 1 Tbsp sugar OR maple syrup, 1 tsp cinnamon, S/P
- Toppings: shredded cheddar, scallions/green onions, sour cream or Greek yogurt, cilantro, avocado, lime juice
- Serve with: tortilla chips (late July 2/$8), cornbread (25% off WF premade)
Approximate recipe savings: $8.50
Approximate Cost per serving: $4.00
Servings: Approximately 6-8 servings
Clean up Rating: 9/10, minimal dishes
Instructions
Take out ALL ingredients less toppings and prepare your prep station: you’ll need a knife, cutting board, a large bowl or plate, and 1 large pot. Put away ingredients as you use them.
Heat cooking oil over medium heat. Dice entire yellow onion and bell pepper, and add to pot when complete. Season with s/p.
Cut beef stew meat intro smaller, bite sized cubes, about 1/2” to 3/4” in size*
Note: you can use ground beef, sausage, boneless pork, chicken, or tofu. My favorite is a combination of pork and chuck roast stew meat, do what’s best for you or use the best deal that week if making in the future.
Add beef to the pot and stir every 3 minutes to brown all sides, about 7 minutes total.
Add our beer to deglaze the pot. Help yourself to a sip if you so choose, you’re doing a great job so far.
Add all beans, tomatoes, spices, and your Better than Bullion Beef Base in ~1 cup warm water - adjust to your own desired chili thickness. Taste and adjust seasoning as needed.
Lower temperature to low, so that your chili comes to a simmer, and add a lid.
Get on with your evening, check back 2 hours later, taste and re-season as needed.
Serve with listed toppings and tortilla chips, enjoy!
Leftovers: Use to make nachos, chili omelet, queso, frito pie, loaded tots
Step it up a notch:
If you have more time/ingredients and want to take this recipe to the next level:
- Brown your meat in batches before cooking onions to create a better sear. Drain or absorb extra juices between batches, but keep the browned caramelized bits that get stuck. Add back all meat after onions cook.
- Use fresh garlic instead of powdered. Add garlic in with the onions/peppers about 30 seconds before adding in meat and other ingredients, stir continuously to avoid burning.
- Add diced jalapeno for an extra kick, mole poblano (1tsp) and chili con carne (1tbsp) if it’s in your pantry, or a slab of dark chocolate 10 minutes before serving for balance.
- Pro Tip: Season everything with S/P as you go, to taste. seasoning 5+ times thoughtfully throughout a recipe vs. just once will ensure everything is flavorful, and you don’t accidentally overdo it. You can always add more; it’s not as easy to take away.
Stats:
Approximate recipe savings: $8.00
Approximate Cost per serving: $4.00
Protein: Approximately 40 g per serving
Alcohol Content: 0% (For those concerned, all alcohol is cooked out of the beer)